
Description
Description
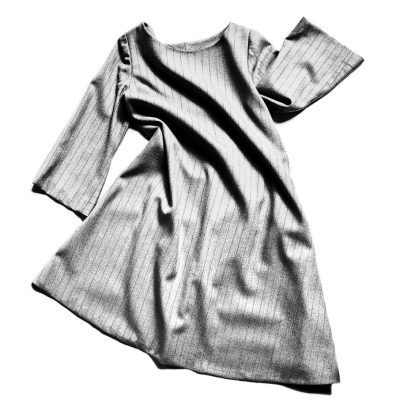
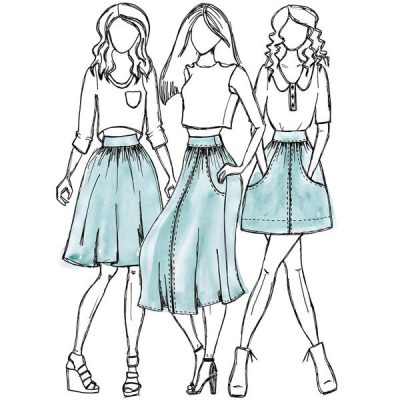
DAISY DESIGNER TUNIC SEWING PATTERN
The symmetrical double angled hemlines give this simple tunic a designer look. Choose your season, make it sleeveless or with a fashionable three-quarter sleeve. The inseam pockets are optional and the neck line is faced and can be top stitched using a contrast colour thread.
FABRIC CHOICES
We Recommend Sewing this product in linens, fine lawns or cotton poplins.
MAIN FABRIC ESTIMATE
| Fabric Width | Sizes 4 – 12 | Sizes 14 – 20 | Sizes 22 – 30 |
| 140 cm / 55 in | 230 cm / 2.5 yards | 260 cm / 2.9 yards | 300 cm / 3.3 yards |
SIZING
| SIZE | A. SHOULDER BREADTH (CM) | B. UPPER ARM GIRTH (CM) | C. BUST (CM) | D. WAIST (CM) | E. HIP (CM) |
|---|---|---|---|---|---|
| 4 | 34.4 | 26.4 | 77 | 60 | 83 |
| 6 | 35.6 | 27.6 | 82 | 65 | 88 |
| 8 | 36.8 | 28.8 | 87 | 70 | 93 |
| 10 | 38 | 30 | 92 | 75 | 98 |
| 12 | 39.2 | 31.2 | 97 | 80 | 103 |
| 14 | 40.4 | 32.4 | 102 | 85 | 108 |
| 16 | 41.6 | 33.6 | 107 | 90 | 113 |
| 18 | 42.8 | 34.8 | 112 | 95 | 118 |
| 20 | 44 | 36 | 118 | 100 | 124 |
| 22 | 45.2 | 37.2 | 124 | 106 | 130 |
| 24 | 46.4 | 38.4 | 130 | 112 | 136 |
| 26 | 47.6 | 39.6 | 136 | 118 | 142 |
| 28 | 48.8 | 40.8 | 142 | 124 | 148 |
| 30 | 50 | 42 | 148 | 130 | 154 |
How Do I Know What Size I Am?
Choosing your pattern size is the most important step and we will help you determine this with these easy to follow steps.
- When taking your measurements ensure that you take them against your skin and not over clothing. One can wear a comfortable bra and knickers whilst measuring, as this will provide you with the most accurate measurements.
- Tape measure has to sit firmly around the points you are measuring. But be careful not to pull it too tight, as this will give you the incorrect size.
- When measuring circumferences (B, C, D, E) it is important to note that the tape measure must remain parallel to the floor. It is sometimes best to take the measurements in front of a mirror; this will help you see the angle of the tape measure.
- You will only require the basic body measurements to determine your pattern size which is indicated on our mannequin below:
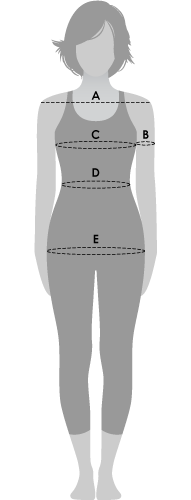
A. Shoulder Breadth
Place the tape at the edge of the shoulder. Measure along the top of the shoulder blade/across the highest point of the shoulders to the other edge, following the natural slope and allow an extra finger for ease of any movement.
B. Upper Arm Girth
This point is taken as a circumference at your widest point of your upper arm.
C. Bust
This point is taken as a circumference parallel to the floor at the fullest part of your chest.
D. Waist
This point is taken as a circumference and taken at the smallest part of your waist.
E. Hip
This point is taken as a circumference parallel to the floor at the widest part of your hips.
Further information id available on the style arc website
Additional information
Additional information
| Size | 18-30, 4-16 |
|---|---|
| Sewing Level | Absolute Beginner |
| Sizing | Standard |
| Fabric Type | |
| Garment Type | |
| Skirt Shape | |
| Clothing Length | |
| Pockets | |
| Fit | |
| Leg Shape | |
| Fastening | |
| Neckline | |
| Waistband | |
| Tops | |
| Jackets and Coats | |
| Dress Shape | |
| Sleeve |
Reviews (1)
1 review for Daisy designer Tunic Sewing Pattern by Style Arc
You must be logged in to post a review.
Related products
Geranium Dress
This product has multiple variants. The options may be chosen on the product page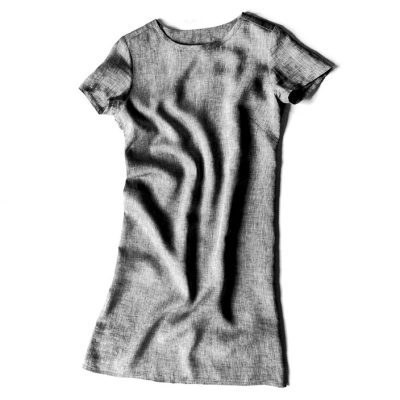


Hilary Harper –
If you are thinking of buying this pattern – don’t. Instructions for making up are very sparse, not what you would normally expect, but instructions for adding the double hemlines seem to contradict and I cannot for the life of me work it out and have abandoned the garment unfinished at the moment until I can find some professional help to work it out. It could be that I am being particularly dense though!